FIGURE CONSTRUCTION
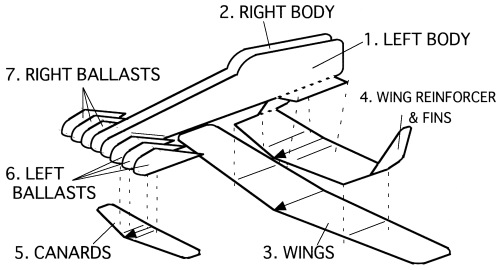
FIGURE FRONT VIEW
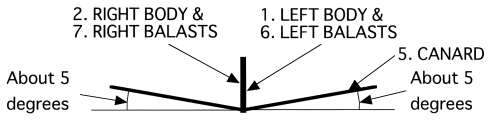
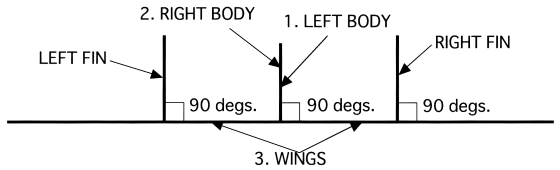
FIGURE REAR VIEW
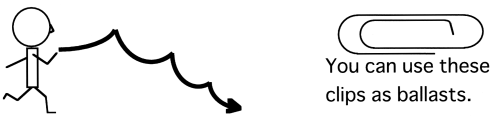
1. Cut the parts out of the paper and glue them together along the 'FIGURE CONSTRUCTION OF "Mark I"'. To make the paperplane beautiful, be conscious about the cutting lines and the glue reference ones. "The ballasts (for the next day)" should be glued if it doesn't fly well at the next day or later. Glue drying may let the paperplane imbalanced sometimes.
FIGURE CONSTRUCTION
FIGURE FRONT VIEW
FIGURE REAR VIEW
2. When the parts are fixed enough, find improper twists, bends, and waving on its body, wings canards, and fins, and fix them straight and flat.
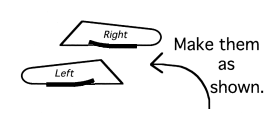
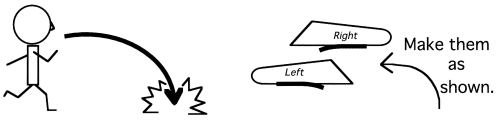
3. Tune up the wings and canards according to the FIGURE FRONT VIEW and the FIGURE REAR VIEW.
4. Have good flights!
CAUTION: At first, check an important point. The paperplane "Mark I" must fly to the direction of its ballasts.If you misunderstand the direction, you will never have good flights.
Throw "Mark I" softly avoiding its attitude declared,and your hand should move as if it is on a straight rail.
If it doesn't fly straightly, check improper twists, bends, and waving on its body, wings, canards, and fins, then fix them straight and flat again.
In case, your checks and fixes do not work, your "Mark I" needs one or more ways of following special settings depending on situations.
Don't worry! It's easy.
| Index | ||
 |
|
|
|
|
|
| Mark V Manual |
Home | Mark II Manual |